Horsey Scale Model Miniatures and More...

Horsey Scale Model Miniatures and More... This blog will let you follow me while I make hand crafted scale model miniatures.

Wednesday, October 21, 2015

Fuzzy Animals

While taking a break from the ceramic animals, I discovered some artists making flocked and haired scale model animals. It's fascinating because the finished animals look VERY real.

For my first attempts, I used Safari and Mojo Brand plastic animal bodies and carved them down to accept the fur. Flocking these is kind of like painting models with fibers and glue. You can also blend the colors to make another color and this looks very realistic on the animal.

The photos below show the animals I've done to date. All these animals are 1:12 scale. The sheep is haired with poodle hair that was clipped off the dog during his grooming session. The bell is brass with a leather collar that is adjustable and removable. This ewe is a donation to Lisa Garcia's model horse show in Chapin, South Carolina. http://palmettostate.my-free.website/


The tri color collie was sold on eBay. He is haired with synthetic fibers from yarn and poodle hair.


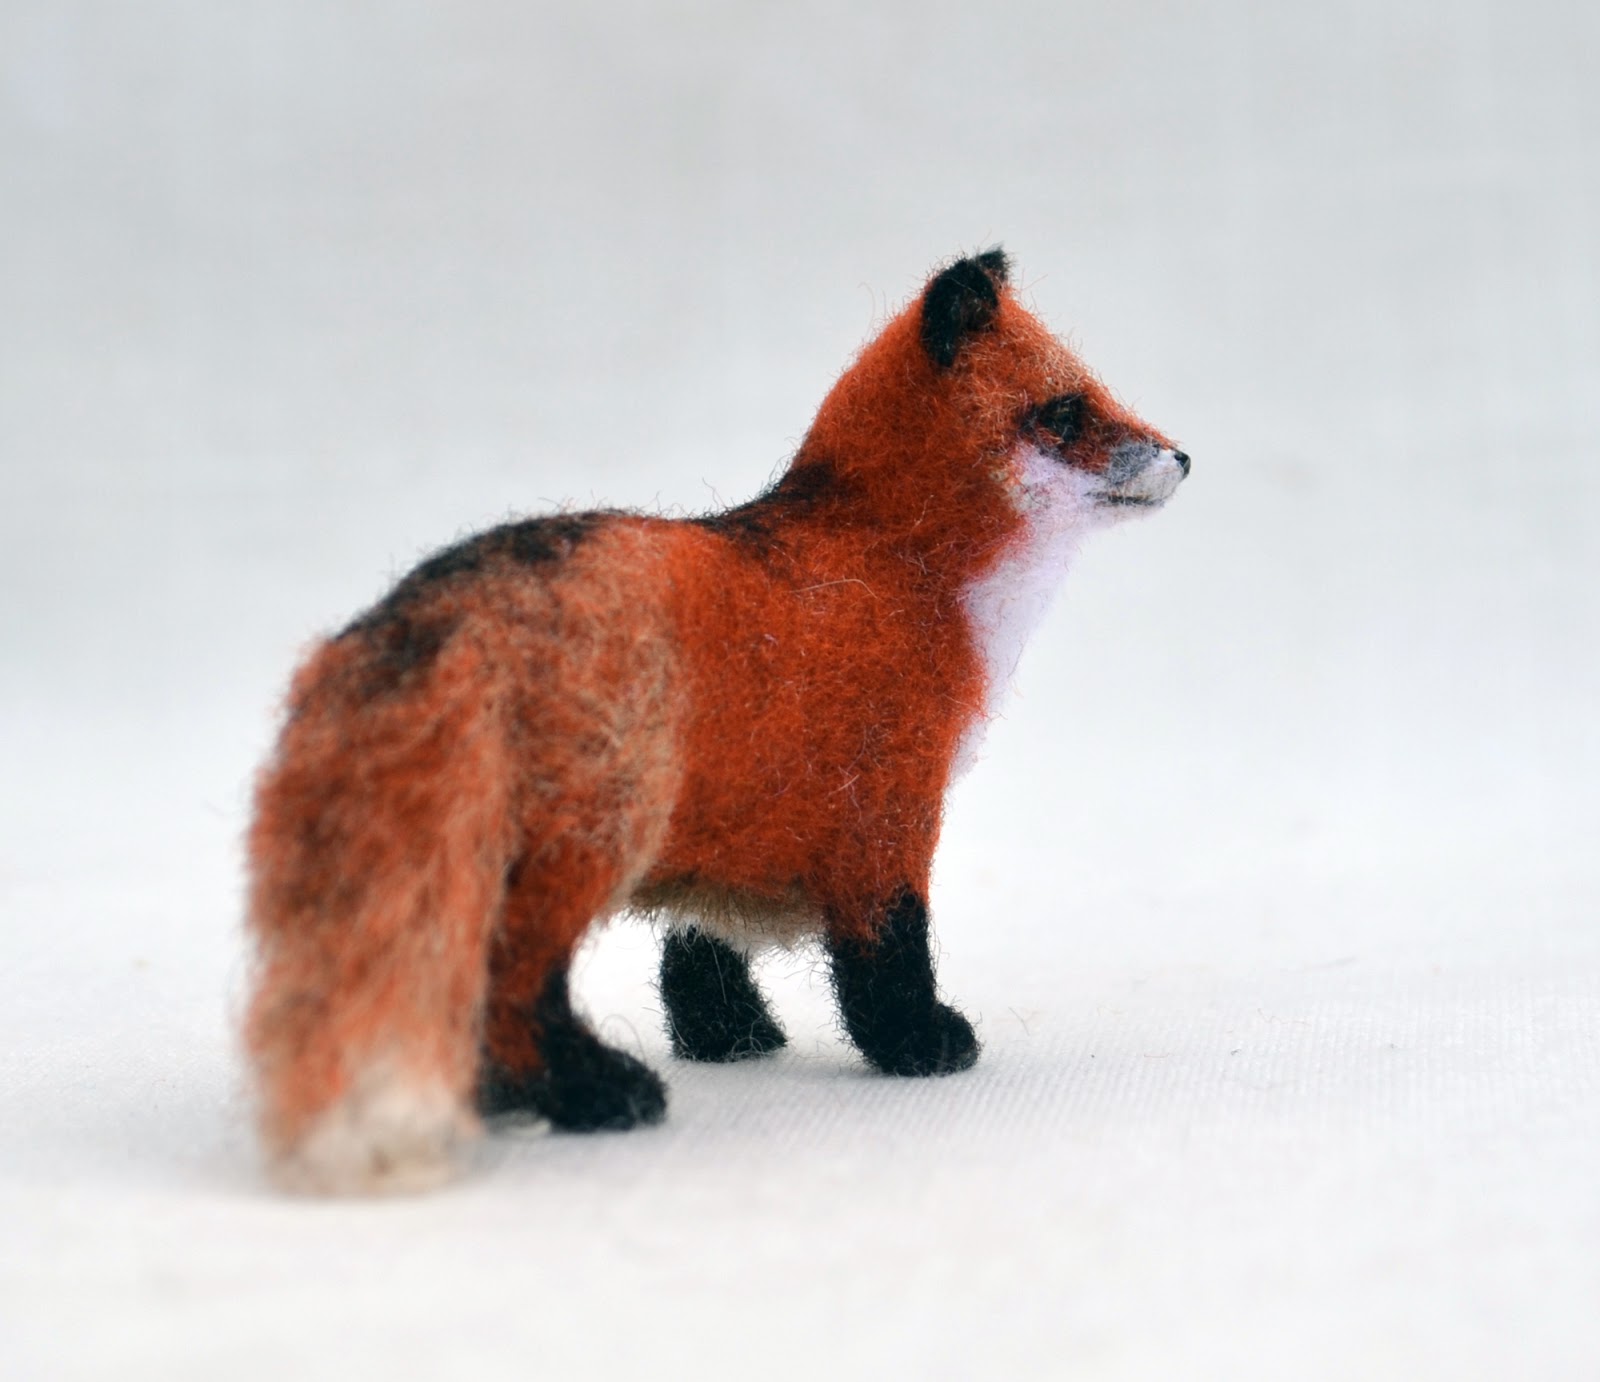
 The red fox is for sale now on eBay. He is haired 100% with synthetic hairs.


 The German Shepherd dog is also for sale now on eBay.


My seller's name is bonanza-set on eBay.
http://www.ebay.com/sch/bonanza-set/m.html?_nkw=&_armrs=1&_ipg=&_from=

There is a very nice hyena that is almost finished and a gray donkey that is in the works.

The commercially made bodies are now not good enough for the fuzzy animals I'd like to do so am building armatures and sculpting my own bodies. In that list there is a domestic Savannah cat and a "scared"  black cat with his back up. I will make a Jack-o-Lantern to go with the black cat.

It's a bit too late to be doing this for Halloween, so I may save the black cat and pumpkin to sell next year.

Thanks for reading.

Meg

Workshop

The biggest news right now is that we are building a HUGE workshop. This workshop will extend the garage and have a room for messy work and a big shower/bathroom/laundry room.

The ceramic horse work is cranking back up slowly as I develop a daily work routine.

Here are photos of the workshop in progress:

Day 1
Day 2
Day 8
The last photo is what it looks like today. I'll post more as progress happens.

Day 16 - October 25-2015


Day 17 - October 26-2015


Friday, June 12, 2015

"Vive la France" Breakables Live 2015


The Breakables Live Model Horse Show specifically for china horses (and other animals) is fast approaching.

The date is Thursday July 16 at the Clarion Hotel in Lexington KY. Info, entry details and class lists are here:


The theme of the show is "Vive la France".

Meg Walker Originals will have a challenge class this year. The awards will be 1st-3rd place hand built clay tiles with different French horse breeds on them. They will be 90% over glazed in full color and have a beaded hanger. The awards can also be put on a small table easel for display. They are about 4.5 x 6 inches in size.

The tiles are in the leather hard stage right now and drying so that they can have their first firing in the kiln. I made Fleur-de-lis and square pattern stamps for the border design.


The plaques were stamped while the clay was wet and then the horses were “sketched” into the clay in low relief. Here is a sneak peak of the awards in process:


The clay will turn from gray to a white color after firing and be ready for glazing. 


The Awards for the 2015 Breakables Live Show - Meg Walker Originals Challenge Class have now had their first firing in the kiln. Before a clay piece can be fired, it has to be bone dry or it can crack and break in the high temperatures of the kiln. 

Before the first firing, the clay piece is called "greenware" (even though it isn't green in color). Greenware is brittle and fragile. Once dried and fired, the greenware usually becomes very much lighter in color and much less fragile. 

After the first firing, which is usually to a higher temperature than the glaze firing, the clay piece is called "bisque ware". The clay used for the awards turned white with a very slight peach tint to it after the first firing. 

This is what the awards look like after becoming bisque:


The next step is to put on any underglaze color I need to do and fire them a
gain.

The underglaze color is on the bisqued tiles. Only the eyes, the darker shaded areas and areas with tiny detail were underglazed. After firing the underglaze on the bisque, the tiles will be overglazed and finished.


Over glazes go on top of under glazes and they have a pigment in them that lets you know where you have put them on the bisque. The pigment is most often NOT what the actual color will be.

This is the Auxois Horse award with the over glaze on it before firing it again.


With an image like this, I use underglaze like oil paint, but I have to work knowing what the color will be instead of seeing it. This tile has 10 different over glaze colors on it.

And this is what the tile looks like after firing:


Monday, February 23, 2015

Making Traditional Scale Model Horse "D" Ring Snaffle Bits

Had been working on several projects and ran into this way to make really nice "D" Ring snaffle bits.

I'm working on an English riding set and wanted some "D" ring bits for the bridle, so got out the jump rings and soldering iron. After soldering I then had to do a lot of grinding with the dremel tool and sanding and using my mini metal files to get the shape right.

A lot of work and this is how they came out:


While in bed, I thought of an easy way to make the "D" bits and I tried it this morning. It's fast, no soldering and they look very nice.

For traditional model horse scale, use 9mm round 18 gauge silver jump rings. I get mine from Fire Mountain Gems. Use jewelry pliers with a flat side and squish the side with the seam of the round ring flat. It should look like the top one now:

Cut the seam part so that there are just two nubs. Now it will look like this:
Use 6mm long silver tube beads and glue the bit nubs into each end of the bead. I used G-S Hypo Cement. You'll have to gently use pliers to pull the last nub in the tube bead top. Now the bit looks like this:
I then mashed a 2mm round silver seed bead and cut it in half. I glued one half to the back of each "D" ring to make the part of the bit that is in the horse's mouth. This is the back of the bit:
And you are finished!
On to bridle buckles....
This is what the bit looks like on a horse:
The horse's name is Darby and he is very sad looking. He will be getting a makeover very soon. He has to look nice for his new saddle and bridle. Stay tuned to this blog to see his makeover.


Wednesday, December 17, 2014

1:12 Scale Duncan Phyfe Style Dressing Table

Since I have actually never made a piece of dollhouse furniture from scratch, this will be more of a "see my progress" project report than a "how-to" blog.

I was going through my back issues of "Miniature Collector" magazine No. 19 and found a Duncan Phyfe dressing table pattern to try.


All the wood pieces have been cut, sanded and stained with Minwax dark walnut. The wood used is from Popsicle sticks or basswood purchased from Hobby Lobby.


For my first try at this, I did not do anything very fancy. There are no dovetails on the drawers. I'm just hoping they will fit the table once it is all glued up. I got a magnetic gluing jig from MicroMark and it arrived this afternoon.


So, I'm going to take this jig for a drive right now and blog tomorrow on how it all went.

December 19, 2014

The Learning Curve

This project is finished and I would not hesitate to display this Duncan Phyfe dressing table in a dollhouse. The jig worked very well for gluing up the parts. Thank you to Tiff, who mentioned using plastic wrap under the pieces being glued on the jig. Wood glue (and the wood piece) does stick EXTREMELY well to the aluminum base.


There were a few minor boo boos on the joinery of the pieces. Next time I will change my sequence of gluing up of the parts. All square box parts should be glued up together first and additions added after that. For instance, all the parts of a drawer can be glued up together, but the legs of the table, with the carved dowel divider already glued in them should be added after the main case is glued up.

I would also change how I stained the wood. If wood pieces are glued side by side, I'd stain the edges, glue the pieces together, and then sand and stain the entire glued up section.


The drawers fit very well.

The drawer pulls are made out of conical shaped brass beads. I added brass wire to these to make the pulls. The knobs  are attached by drilling a 1/8th inch hole in the drawer front and using Epoxy Weld to glue the pull in place.

Completely finish the drawer front, including the paste wax final finish, before drilling the hole for the pull.

Next time I also will NOT use my household drill to drill holes in the wood of miniature furniture.
I will use my Dremel tool and a diamond burr drill tip.


For the final finish I used Minwax brand Paste Finishing Wax. Rub it on the wood, let it dry for about 10-15 minutes and then buff it with a soft cloth. The paste wax made this piece have a very nice luster and look like a real piece of furniture.
It really brought out the beauty of the wood grain.

I got a 1 lb can of the furniture paste wax at Lowes. This pretty much gives me a lifetime supply for making miniature furniture.

My thought is to do this project all over again using the techniques I learned.

My next thought was that it is time to move on and do a different piece of furniture and use my new techniques on the new project.


Saturday, December 13, 2014

My New Home in South Carolina

Hello Everyone,

Just starting in on something new for me: a blog.

I plan to journal most of my projects for scale model miniatures on this blog, with an emphasis on horses.

For my first post, let me say I'm so excited and happy to be back home and living in South Carolina again. Time flies. I can't believe I have been here almost a year now.

My house in Katy, TX sold for a very good price and I was able to buy two acres of beautiful country property and become totally mortgage free.

This was the first sunset photo I took from my back yard.


Rainbows happen often here.